What's the Beta: A Dirtbag Guide to Bishop Bouldering
Bishop, California is a sleepy little town along the desolate Highway 395 running north to south along the eastern base of the spectacular Sierra Nevada mountain range. Isolated from major civilizations by these monolithic mountains to the east and Death Valley to the west, Bishop resembles something from the Wild West, centrally located around one single street that also happens to be the highway.
Despite its demure and unassuming appearance, Bishop attracts some of the most premier athletes in the world and contains some of the largest concentrations of hard bouldering in the world. Within twenty minutes drive, you have access to four supreme climbing areas.
This is a brief guide to the area, though if you’re heading there on a climbing trip, definitely snag one of this year’s new guide books. Between the two, I recommend the full guide, not the Select one. With almost twice as many problems, it’s well worth the extra $15.
*This post contains affiliate links.

Navigation for Bishop Rock Climbing Guide
The Climbing
Buttermilk Boulders
By the far the most iconic and premier of Bishop’s climbing, the Buttermilks are filled with granite highballs that have attracted some of the world’s greatest climbers over the years, included and definitely not limited to Chris Sharma, Daniel Woods, Alex Puccio, Nina Williams, and Alex Megos. They’re huge, they’re hard, and they’re legendary.
Down climbing the Drifter Boulder after topping High Plains Drifter (V7).
Get there: Take Highway 168 west out of Bishop and, after ten miles, turn right onto Buttermilk Road. It’s a dirt road that is often is really rough condition, so take something with decent clearance and preferably four-wheel drive, depending on whether or not the road has been graded recently. Know that in the event of snow, you won’t be able to drive on this road without snow tires or chains, and AWD.
Climb: The first area you’ll reach is the Buttermilks Main and with the giant Grandma and Grandpa Peabody boulders to welcome you, you’ll be hard pressed to miss it. You can park right along the road or drive ahead a little more and park at the lot near the Roadside Boulders, where there is a pit toilet as well. These two area make up the bulk of the Buttermilks and are quite condensed, making one able to walk from one side to the other in maybe ten minutes. Other outlying areas include the Get Carter Boulder, the Beehive Boulders (quite an approach away but home to the iconic V15, The Swarm), the Bardini Boulders, and the Checkerboard area. For further details and area beta, grab a copy of the Bishop Bouldering guidebook (see above).
Happy Boulders
For Bishop locals, the Happys are a bit like their gym. A little easier than the Milks and far less big (though there are still some R-rated climbs with consequential falls such as the V6 Atari) the volcanic boulders of the Happy are filled with sharp pockets and delicate crimps. Located in a canyon cutting through the Volcanic Tablelands, the Happy Boulders are a great place to go on days of bad weather in the Milks. While the wind can funnel through the bottom of the canyon, the upper edges are more sheltered from the wind than the Milks and, being lower in elevation, it’s always warmer and drier.
Standing Kill Order (V9) in the Happy Boulders
Get there: Head north out of Bishop along Highway 395 and take the left fork when the highway splits into a V. Follow that road until it turn to across a cattle guard onto Chalk Bluff Road. Follow this dirt road, being mindful that in places it is only wide enough to accommodate one car, several miles. You’ll pass the Sad Boulders and finally come to a long pullout on left side of the road with an outhouse. This is the Happy parking lot. Cross the road and make the short, but steep, approach hike into the canyon.
Climb: All of the climbing is very centrally located (considering it’s all inside a canyon) and you can from one area to the next in a matter of minutes. Don’t forget about some of the climbs located higher up along the canyon walls. There are some great problems in these areas, like my favorite V6, Mr. Witty. Plus, there you get the awesome sensation of topping out onto the Tablelands and suddenly having the land open up all around you.


Sad Boulders
Like the Happy Boulders, but smaller, the Sads are located in an adjacent canyon in the Volcanic Tablelands just a couple miles away from the Happy parking lot.
Druid Stones
Located just southwest of Bishop, this interesting little area has seen less development than the others, but is still home to hundreds of problems, with the possiblity of so many more. It has the same quartz monzonite of the ‘Milks with none of the overtraffic polish and crowds. The only catch is, you have to gain 2,000 vertical feet to get there with a 30-45 minute hike. No better way to warm up for your sesh! Stashing pads is a common practice for anyone looking to serious climb in the Druids.
Sherwin Plateau
To REALLY get away from the crowds, make your way here for some more isolated bouldering and even some limited sport on the volcanic rock.
Get there: This crag is located 22 miles north of Bishop in the direction of Mammoth Lakes. When you see signs saying Sherwin Summit, turn right onto dirt road 4S43, drive for one miles, then turn left onto 4S05. Shortly after, the road forks. Either will take you where you need to go, though the right fork is shorter and only for cars with high clearance.
Owen’s River Gorge
While Bishop is known first and foremost for its bouldering, Owen’s River Gorge is an equally awesome sport climbing, though I personally, I have only ever gone to Bishop to boulder. It is considered the most concentrated sport crag in California with tons of solid moderates and plenty of hard routes on the volcanic rock.
Get there: Go north from Bishop on 395 to the Paradise Swall Meadows exit and go right. After about 0.5 miles you will reach a T-junction, where you turn left onto Gorge Rd. Three various parking areas for access to different area of the Owen’s River Gorge are all down this road.
Chris (left) contemplating the likelihood of a send on The Mandala (V12) on a snowy late February morning in the Milks.
What To Pack
After two weeks in Bishop, your hands are pretty much shredded.
Skin Care Kit: Bishop is BRUTAL on the skin, especially in the beginning. With the dry atmosphere and sharp crystals, it will shred and poke holes until your skin gets glassy and hard. Then you start splitting. In the Milks, rest days are actually called skin days. To keep your skin healthy and send solid, treat it every night with moisturizing and healing balms. The trick finding ones that don’t soften your skin while healing. I’ve used a variety of climber balms over the years and found the following to be the best:
Climb Skin (sponsored by Friction Labs for US manufacturing): Great for all around fast moisture absorption. I put this on about an hour before climbing to get some moisturizing action without making the skin too greasy.
Joshua Tree Organic Climbing Salve: The powerhouse skin healer, this stuff is super greasy. It coats your skin for a long time and promotes deep healing. That said, it’s great for right before bed, but no other time, because it leaves your skin very greasy for about an hour.
Rhino Skin Products: We’ve tried every Rhino Skin product there is and love them for different uses. For Bishop, the Repair serum is great for post climbing healing with the Performance serum is great for pre-trip and during-trip skin maintenance to balance levels of dryness and durability. Both of these absorb fast. If you have extra sweaty soft tips like me, try their Mikey’s Tip Juice as an antiperspirant (similiar to antihydral but legal to buy in the US!). Or to try the full product line-up and test them all, get their whole Skin Abuse Specialist pack.
Super glue: Sometimes, you don’t have time to let something heal on its own and a temporary fix is better than a gaping split.
Skin file: Filing down callouses is so necessary. It might seem antithetical to file away all the tough skin forming to protect your self, but if callouses get big enough, they’re actually more likely to peeling into some nasty flappers. We use the ones int he link above because once you wear out a sheet, you can peel it off and stick a new one on, so the handle gets reused over and over.
Mini Thermometer / Hygrometer: Bishop is great because, for the most part, it’s very dry. However, even a small percentage of humidity can make the polished crystal nature of quartz-monzonite much harder to hold (more so than other types of rock). Weather stations are at least 10 miles from the Milks so a portable gauge for telling you the humidity is helpful for finding the right sending window.
Little crag helpers scraping the snow off our pads.
Snow scraper: Just a standard car brush will do, but it’s super helpful for brushing snow off the tops of boulders and your pads. Ideally, you won’t be facing snow, but if you’re going in Prime Sending Months, there is a chance you’ll see a little snow at the Buttermilks. Remember, the elevation is nearly 5,000 ft.
Stick clip/brush: Whether or not you buy a fancy brush like Trango Beta Stick or make your own out of a a stick, some tape, and a chalk brush, it’s still nice to be able to brush any dirt and chalk off higher holds. For an even longer and sturdier pole, check out the Trango Squid 8ft. pole.
Crash pads: Bring ALL your pads. All of them. Bishop is highball heaven and you will want ample landing. We use 2 Mad Rock Mad Pads and 2 bigger pads, like the Black Diamond Impact and Mad Rock Tri-Fold Triple Mad Pad. If you plan on doing some highballing (I mean it’s Bishop so you probably are!) it’s not a bad idea to bring and/or invest in a larger pad with greater coverage and a higher foam density. The Black Diamond Mondo Pad and the Metolius Magnum tri-fold pad are pretty much the biggest on the market right now.
Find more crash pads here: Backcountry
Spotter pad: Hopefully you already know the importance of bringing plenty of crash pads for the highball monsters of Bishop, but you may not think about the importance of a spotter pad. Merely a sheet of thin foam that folds into a small compact piece, a spotter pad may not seem all that useful, but it acts as a great seam sealer over top of the rest of your pad conglomeration. Even if you have plenty of pads, the possibility of landing a foot right between two pads is very real. It happened to us off the highball crux of Saigon Superdirect (V10). The Metolius Shortstop pad, the Asana Pro Spotter Pad, or the Petzl Nimbo are great examples.
Tendon therapy kit: Whether this means a therapy bar, ArmAid elbow roller (which are an investment but seriously amazing for serious climbers), or a simple therapy ball (which is what I use). You’ll definitely want something to roll out your aching elbows and forearms at the end of each day. Since climbing trips are limited on their time, you’ll probably find yourself climbing more and harder back-to-back than usual, and resting a little less than your body might need. It’s okay to push yourself, but self-care where you can is still important.
A wind resistant shell: The Buttermilks are located in alpine desert, meaning the wind can absolutely rip through the area. On high windy days, it is downright miserable, and even on milder days, the wind can chill you pretty instantly. A layer to repel the wind is far more useful than any rain jacket. Personally, I vouch for the Outdoor Research Ferrosi jacket. It’s really light and stretchy, so it doesn’t limit movement on a climb, but it really does keep the wind out. For something a little heavier on the really cold days, the Outdoor Research Winter Ferrosi is super durable, warm, and windproof. A Patagonia Houdini ultralight windbreaker doesn’t hurt to have on hand either. They take up no space but can add a little extra wind protection even on warmer days.
A puffy jacket: Spring Break in California! Sun and surf and all that good stuff, right? Wrong. Maybe for the coast, but east of the Sierras, it’s still cold in those fringe seasons and you’ll be thankful to have your down puffy for down time or spotting duty. I love my Outdoor Research Refuge Hybrid Hoodie for warmer days (or for actually climbing because it doesn’t hinder my motion), and my Outdoor Research Baja Down Pullover for spotting and bundling up.
Shower towel: Unless you plan on staying in hotels the entire time, this is a must for campers. Most places you’ll find to shower, included the Hostel California that we always use, does not provide towels in the price of a shower. Just bring a simple microfiber travel towel will do.
What NOT To Bring
An abundance of clothes: It’s really easy to want to be prepared for anything and over pack. I made this mistake. In reality, you’ll be filthy all the time, especially if you’re camping or living from a van, and you’ll end up wearing the same things day after day anyway.
Your ego: So you climb V7 or V8 in the gym? Well, get ready to struggle on V2. Bishop is HARD. It’s hard climbing on the hardest type of rock out there. Don’t expect to climb at the same level you might be used to and most importantly, don’t get discouraged if you aren’t meeting your own expectations. Just enjoy the time and be mindful that it is normal to struggle. The best thing is to go there without any expectations; just bring plenty of stoke to climb as much as you can, regardless of numbers.
The Town
When to Go to Bishop
Our rental camper van out of LA, Rachel, was not equipped to handle the unexpected snowfall and she got stuck on Buttermilk Rd. We parked her there and hoofed it the rest of the way in!
February and November are considered Prime Sending Months, or PSMs as I call them for short (not to be confused with PMS). While yes, they can be cold and the weather a little finicky, the cold is what makes them perfect, optimizing the stickiness of your shoe rubber and the friction between your hands and the granite. If you don’t believe me, trying hopping on Evilution on the Grandpa Peabody boulder around 5pm in the afternoon after the sun has been baking it for a couple hours. Grease factor makes it grades harder.
The next best months are March and October, though you might have to be willing to get up a little earlier and stay up a little later to climb. Mid-day heat make for difficult climbing conditions.
December and January are typically too cold and snowy, though on occasion Bishop is known for unseasonably warm weather in these months, especially January. This last year, January actually had better, less snowy weather than February (when we were there… of course).
Forget going in the summer months, particularly May through August, unless you plan on purely doing some night climbing away from the heat of the sun.
Where to Camp in Bishop
One of the single best things about Bishop is how easy and affordable it is to camp there. Vanlife in Bishop is so incredibly chill. Free camping abound! Unlike many other popular crags with limited public land and only expensive campground alternatives, Bishop is filed with free, dispersed camping options on the thousands of acres of BLM land. Just be careful not to accidentally camp on L.A. property (which the city owns due to water rights), but in these instances, there are always signs warning you.
The Buttermilks roadside camping: There are tons of wide spots along Buttermilk Road, as well as along Highway 168 right before the Buttermilk Road turnoff. One of our favorite camp spots is actually out there because it’s so utterly private and peaceful. You can also camp at the Roadside Boulders parking lot, where plenty of climbers camp in order to have quick and easy access to the boulders. However, unless you are van camping, the round here is heavily trafficked, hard, and not ideal for tent camping.
Cost: Free
Limit: 28 days
Amenities: None or nearby pit toilet (if at the Roadside parking lot)


The Pit: Probably the most popular camping option for climbers, The Pit is located on top of the Tablelands close to the Happy Boulders, as well as near a shortcut to the Milks. Factor in that with the cheap cost and the facilities provided, it’s no wonder so many climbers find themselves there. Plus, then each night is a big social event around the campfire!
Cost: This was recently changed from $2 per vehicle to $5 per site. If you make friends, share a site and split the cost like we did.
Limit: 60 days
Amenities: 4 outhouses (stocked with toilet paper), metal fire pits, trash/recycling
Pleasant Valley Campground: Just beyond The Pit right before the turnoff onto Chalk Bluff Road (to get to the Happys) this nice, riverfront campground is a good option for larger campers and RVs that might have trouble fitting elsewhere or making it up the hill to The Pit. It also attracts a lot of fisherman due to its proximity to the water. However, as of March 2018, the campground was temporarily closed due to a wildfire that swept through the area in late February. No word yet on when it will reopen.
Cost: Unknown
Limit: 16 days
Amenities: water well, vault toilets, trash/recycling
***PLEASE NOTE: Be responsible with campfires! A Smokey the Bear sign will remind you of that on every drive you make up to the Milks. Given the dry state of the area and the recent history of California wildfires, it’s so very important so be mindful of this. And note that in the state of California, one must get a fire permit prior to the trip. It’s fast, free, and easy to print online, but still a necessity.
Where to Stay in Town
Most people bound for Bishop are going to be camping or van camping, as we were, but sometimes a night in a cheap hotel in the middle of your trip can be a nice way to spend a rest day and truly let your body and mind recover. Do dishes, shower, and you know, practice basic human hygiene. Assuming anyone reading this will be closer to dirtbag status than mom and dad on vacation in the Bahamas, here are some great budget options in Bishop.
Mountain View Motel: It’s not the prettiest or swankiest hotel in town, but it definitely does the trick for those on a budget. Each room has two double beds, meaning you can sleep four people comfortable for about $10-$15 each (rooms vary between $40-$70 per night depending on season). The showers are hot, the rooms mostly clean, the wifi free, and the continental breakfast is simple but filling. You realty can’t ask for more with the killer rates.
Trees Motel: Located right next door to the Mountain View Motel, this motel is just slightly more expensive, but a little more nice and quaint.
Hostel California: Funnily enough, this hostel really isn’t much cheaper than the budget hotel options in Bishop, but there is something to be said of the vibe of the place. Built pretty much for climber dirtbags, the entire place is decorated with outdoor brand stickers, vintage climbing gear, and all other sorts of other climbing knick knacks. It definitely gets points for aesthetic, and, over the years, it has housed some of the most famous climbers ever to hit the Milks, including Nina Williams (who was there projecting The Swarm during our last visit).
Vagabond Inn: Starting into some of the nicer looking hotels, the Vagabond Inn is still a super affordable option (room rates usually around $70 per night) for something a little more upscale if you really want to treat yourself.
Helpful hint: Rates differ drastically between weekends and weekdays. In the middle of the week, we paid $40 a night at the Mountain View Motel. Later on that weekend, we paid over $60, and that was with her giving us a slight discount. Of course, peak season prices differ from off seasons ones, too, but happily,, the prime climbing months are the less than prime vacation ones.
Chris standing atop the Get Carter Boulder after topping out Seven Spanish Angels (V6).
Where to Eat in Bishop
Mountain Rambler Brewery: More than likely, if you’re going to Bishop, you’ll end up at some point. Most climbers do, as it’s a great gathering place in the evenings to drink and share stories of send and lament injuries together. It’s packed almost every night, and for good reason. The craft beers are excellent, and modestly priced, and the food is all super unique with a healthy-ish twist on stand bar food.
Must try food: Lamb empanadas.
Jack’s Restaurant and Bakery: This was out very first stop upon arriving in Bishop. It’s a kitschy, rustic diner with a old western theme. It’s a great stop for a fast, sit-down meal on a budget.
Must try food: German chocolate cake (get a whole one to go and dine on it for the nest few days!)
The Village Café: Only open for breakfast and lunch, this dinky little diner is a dream come true for climbers who maybe don’t feel like having cold overnight oats and crappy instant coffee. Their menu boasts all the expected breakfast plates that come in huge portions for virtually pennies. Nothing says bouldering like an absurd amount of biscuits and gravy!
Must try food: Fresh fruit bowl along with biscuits and gravy
Perry’s Italian Café: Two words: Carb loading. This laid back Italian restaurant is somewhere in the direction of fine dining, but to the point where they don’t frown at you when you walk in with chalk on your face and dirt under your fingernails. The staff is all super friendly and the meals are huge and cheap. Where else can you get a full surf and turf with king crab legs for like $35?! For a break from hot dogs and baked beans, definitely spurge a little one night and go here.
Must try food: Calamari appetizer
Erik Schatt’s Bakery: This place is world famous for their huge assortment of unique pastries and sweets and should be a stop on your list purely for the interesting architecture of the building. Driving down Main Street, you can’t miss it. Their sweets are overpriced but the bread is delicious. Try the Pinto Bean bread if it’s in stock because it’s honestly the most delicious bread I’ve ever tasted.
Pro Tip: Check out the discount racks in the very back room for crazy good deals on day-old products. Bread loaves for $0.35?! Seriously.
Hing’s Donuts: It’s almost like the good folks of Bishop known that the best sending food is ultra sugary, high carb pastries. This donut shop is rad, with a giant selection of delicious and crazy combination donuts. Stop in and grab a couple to take with you to the crag.
Looney Bean: An awesome local coffee shop with tons of seating and couches for you to chill on and bum the free wifi on your rest days. If you get one coffee there, you can get refills all day for $0.25 each. At some point, definitely try their Awake Shake, which is probably one of the best smoothie/milkshake concoctions I’ve ever tried.
Black Sheep Coffee Roasters: Another small coffee shop. Climbers will typically alternate going to here and Looney Bean on rest days and evenings where free wifi is desired. There is less seating here, however, so you might find the place full.
Great Basin Bakery: Delicious breakfast food and cinnamon rolls as big as your head. “If you don’t know, go eat Schatt.”
Water Fill & Waste Dump in Bishop
If you’re visiting Bishop in an RV or camper van, you’ll need to learn where to fill your water and dump your waste. Fortunately, it’s easy. Seriously, we’re experts on Bishop vanlife (we’ve spent a collective three months there doing it!) and it’s the easiest place ever.
Drinking Water:
The Visitor’s Center has a free drinking water tap around the side of the building by the parking lot and river. It comes out fast, too, so you can use it to fill pretty big tanks in minimal time.
This place is also a great resource because there are outhouses over by the baseball field, and recycle bins (actually the only glass ones we found in Bishop- also over by the ballfield, not the ones on the sidewalk).
Waste Dump:
The ARCO gas station just south of town on Highway 395 has a free (or you can donate if you desire) RV dump site with two holes that’s open year round. There’s also water on site to rinse your tanks but this is NOT potable water. It’s fine for doing dishes but I would’t drink it directly.
You can also fill propane tanks here right next to the dump station.
Where to Shower in Bishop
Yeah, yeah, I know, showers are for the weak. Just use Wet Ones! Well, that’s all fine and dandy for maybe five to seven days, but even dirtbags need a shower once in a while. Check out shower maps of the whole Highway 395 here, but more than likely, you’ll end up at one of two places in Bishop.
Hostel California: By far the best option in Bishop, $5 per person will buy you an unlimited length hot shower and usually some free soap and shampoo left behind by previous guests. Go in the middle of the day, however, when the hostel is typically empty and you won’t have to wait around for the shower, and bring your own towel because the hostel doesn’t provide them.
Wash Tub Laundry: Just a block off the western side of Main Street, this Laundromat offers 10-minute showers for $5 (with towel included). The trouble with this place is catching the owner actually there. If he isn’t, you can’t access the showers. Word has it, he’s there more in the evenings, which makes sense because every time we tried to catch him, it was mid-day.
Keough’s Hot Springs: Located just a little south of Bishop, this resort built around natural hot springs offers a lot to the weary bones of the dirtbag climber, the least of which being showers, costing $4 for a 7-minute token.
Where to Get Groceries in Bishop
Vonn’s: The California branch of Safeway is your one stop shop for everything from s’mores supplies to booze… you know, the essentials for a climbing trip. If you’re not a member of the Safeway Club from back home, you can sign up instantly for free and get pretty good deals on groceries. Pro-tip: If you need to air up your tires, go to the Vonn’s station. Go inside to the counter first and they’ll usually let you air up for free, rather than pay at the pump.
Grocery Outlet Bargain Mart: Bishop’s newest grocery store and absolute heaven for poor dirtbags. This chain essentially carries discontinued grocery items, selling them at huge discounts. That basically means you can get high quality food, beer, and wine (as in EXPENSIVE name brand stuff) at a practical steal. Because the stock is always changing, you may not be able to find everything you need, but you can save a lot fo money by shopping here first. It’s located just north of Vons.
K-Mart: Yep, they still exist and in some places, replace Wal-mart! While K-Mart is sort of an eerie nightmare from childhoods past, it is useful for those odd items you might not be able to find at Vons, like Coleman Propane canisters for your stove.
Blue Lupine: For you healthy, organic, non-GMO, locally sources, vegan dieters out there, this is your one stop shop for health foods, including local meats and produce.
Where to Buy Climbing Gear in Bishop
Bring all the pads! And make friends that have more.
Crash Pad Rental:
We get that depending on where you’re coming form, it might be pretty difficult to get a sufficient amount of pads for the highball monsters. Chris and I, between the two of us, brought three and made good friends down there with whom we shared pads. The culture encourages it, and no real climber is going to tell you no if you ask to use their pad for a second. However, if you do happen to find yourself abysmally short on pads, you can rent them from around Bishop and, assuming you probably flew into LA prior to arriving, from that area. Just be aware that supplies are limited and, depending on the time of your trip, they may be all rented out.
Hostel California: This is mostly reserved for hostel guests, but you can borrow pads right form the hostel.
East Side Sports ($10/day)
Sage to Summit ($10/day with discounts for multi-day and week rentals)
Mammoth Mountaineering ($10/day)
A16 Outfitters (Los Angeles, right off the freeway on the way to Bishop): ($15 for 1st night and $4 for each additional night)
Mammoth Mountaineering Supply (Bishop)
The self-described “red-headed step child” of a store by the same name an hour north in Mammoth Springs, this an awesome little gear exchange shop that both sells new gear and used gear and outdoor clothing on consignment. In other words, you have the opportunity to find great gear at killer prices. On my last visit, I found a Patagonia Synchilla Snap-T pullover (retailing at $129) for $20! It’s also a great resource to get rid of any gear you don’t want to haul back home with you.
Mammoth Mountaineering Supply (Mammoth Lakes)
If you plan on doing any skiing in Mammoth while your in the Bishop area, this shop is the place to grab any last minute ski gear you might find yourself needing.
Eastside Sports
A large shop specializing in outdoor gear of all kinds, this is a good one-stop location for whatever your gear needs are, from trail snacks to skin balm to camping gear.
Sage to Summit
A little on the smaller side, but that means you get some really friendly and helpful staff. A great place to go not just for gear, but for some advice about the area and things to do there. The owner Karen is super sweet and helpful. They also recently added on a climbing gym annexed to the shop. Its’ super small but has all the essentials: campus board, Moon Board, weights, tread wall, hang boards, and more! Awesome little spot to keep up your training or hang out during bad weather.
Plus they sell my stickers!
Elevation (Lone Pine)
One of my favorite gear stores I have ever come across, this store is the epitome of ten pounds of stuff in a five pound bag. Tons of gear and tons of guidebooks available for whatever you’re in the area to do. Consider grabbing the Bishop Bouldering guidebook here. If you’re driving north toward Bishop through here, or are planning to do some climbing at the Alabama Hills down the Whitney Portal Road, take a break to stretch your legs and stop here.
Free Wi-Fi in Bishop
The town of Bishop supposedly provides free wi-fi down all of Main Street, but I found it to be a little tweaky, so be warned. Other spots for free wifi include:
Looney Bean
Black Sheep Coffee Roasters
Starbucks
Mountain Rambler Brewery
Bishop Public Library
Von’s Grocery Store
Hot Springs Near Bishop
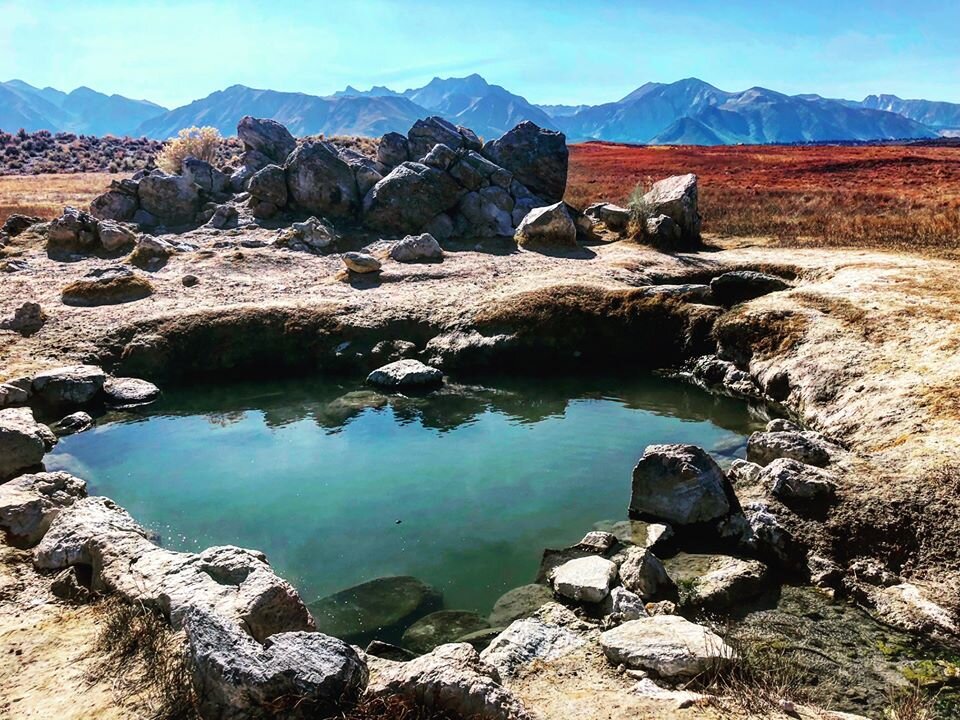
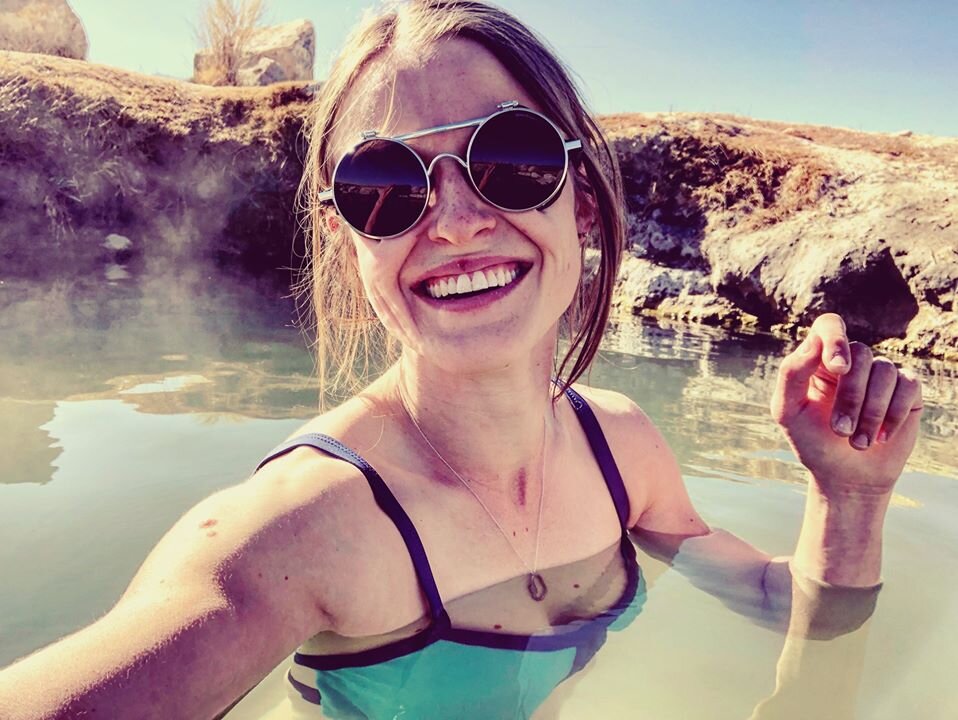
If you’ve perused the Instagram tags for Bishop or the eastern Sierras, you’ve undoubtedly seen numerous photos of people gloriously enjoying relaxing dips in the serene and crystal clear natural hot springs. The photos are practically dreamy, and sure enough the hot springs are magic.
Unfortunately there aren’t really many right in Bishop itself. Keough’s doesn’t have a great reputation and you have to pay to get in, and the Fish Slough hot springs (out on the tablelands near the road toward the Happy/Sads) were all dried up when we went to check them out.
For the best hot springs, you have to drive north toward Mammoth and the Benton Creek Crossing area. There, you’ll find an endless sprawl of primitive dirt roads criss-crossing and leading to various hot springs. I haven’t been to even close to all of them, so explore away.
My personal favorite is Wild Willy’s, best known for the near perfect heart shape of the pool. I was lucky enough to snag a blissful 30 minutes in the pool totally alone (RARE at that particular pool).
Sure, we spent a couple rest days hiking around the Fish Slough area just north of Bishop trying to find some there, but they were all dried up. Because I can’t give personal accounts of the springs, I recommend taking a look at this blog, which provides a great description and directions to each of the pool along Benton Creek Crossing.
Must Do Problems in the Buttermilks
Grandma (right) and Grandpa (left) Peabody Boulders are the biggest beats of the Buttermilks. See the tiny climber in blue for scale.
Sharma Traverse (V10)
Green Wall Essential (V2): There is no better initiation to the world of the Buttermilks than to hop this insanely hard V2 climb with pretty much nonexistent feet. Mention the Green Wall Boulder to any climber in Bishop and you’ll notice them visibly cringe, but it’s a right of passage.
North Face Direct (V2): A great warm up climb on the backside of Grandma Peabody, this climb begins on the jug start of Peabody Essential (V0). Climb diagonally through the huge hueco jugs. I did this climb every day for a warm up, and I recommend the same for anyone going to the Buttermilks Main.
Iron Man Traverse (V4): Speaking of good warm up climbs, an area favorite, and probably the single most iconic looking route, is the Iron Man, a V4 traverse across a gradually narrowing lip. It’s great as a warm up because you can just keep going farther and farther down the ledge as you get warmer.
The awkward and fun start to Birthing Experience (V1).
Birthing Experience (V1): Hardest. V1. Ever. But’s hilariously fun and demands a bit of creativity. Located on The Womb, a small boulder right behind the Drifter Boulder, most people find themselves messing around on this in between burns on harder climbs on the Drifter. Or wait until the end of the day, get blasted drunk, and give it a go. You’re only like two feet off the ground. The whole point of this climb is to stabilize in a low-to-the-ground hueco and somehow extract yourself to the jugs outside. Sounds easier than it is!


Seven Spanish Angels (V6): Let me just say that this is quite possibly one of the best climbs to come out of Bishop. The drive to Get Carter is a little sketchy, but this climb makes it more than worth it. Dynamic movement, meathooks, crimps, and not an overly high topout: this climb has it all. Unable to quite nail the last couple moves, this climb became my “one that got away”.
High Plains Drifter (V7): This climb is widely known as the mega classic of Bishop moderate problems. The movement feels fantastic, demanding a lot of static, core tension until you get to the lateral dynamic “drifter” move after which the route is named. Hit the jugs and you’ve got an easy highball topout up the patina to finish. A great way to feel on top of the world without the terror of getting there, like some of the other topouts.
My try hard face on Green Wall Center (V6).
Green Wall Center (V6): If you weren’t entirely put off my Green Wall Essential (or even if you were), hop on the line directly to its right. Like the former, the feet are glassy, but the hands are good, and this climb is a pretty addictive in terms of figuring out the exact right crystals that give enough purchase.
Saigon (V6) or Saigon Direct (V8): Another Buttermilk Classic, these two variations of the same start are an excellent summary of Bishop bouldering: A little high, a little dynamic, and a little gutsy. Unless you’re really into scaring yourself, though, I do not recommend the final variation of the climb, Saigon Superdirect, a V10 mini highball with the crux right at the very top. I watched several people, including sponsored climbers, fall off that move and tumble 20 feet to the ground. Chris actually blew the move and landed with his ankle right between two of the pads. It was tweaky the rest of the trip.
Evilution (V10 to the lip, V11 to topout): Much like High Plains is the mega classic moderate, Evilution is the mega classic of the upper tier problems, located on the 45° overhang on the massive Grandpa Peabody Boulder with a punishing pile of rocks stacked to reach the start hold just below. Bring lots of pads and made friends that have even more. You’ll need at least one or two covering the rock pile and a sea to cover the full fall zone.
Other Helpful Hints
Watch the weather forecast: It’s easy to look at a weather forecast and say, “Yeah, but those things are never right.” Remarkably, the Buttermilks forecast is almost always accurate, especially from Climbing Weather. Be especially mindful of the wind, as that can really determine whether or not its worth taking a rest day or not.
Be considerate of conservation: LEAVE NO TRACE! The Happy Boulders and the Buttermilks are some of the most trafficked crags in America, and as such, we must be extremely mindful of ethical concerns so as not to damage the ecosystem and force access restrictions on the area. Much of the Buttermilks is under re-vegetation efforts, so stay on the paths. It’s really not that hard. Pack it in, pack it out, even biodegradable things like fruit peels and apple cores. While technically natural, they can really damage the fragile ecosystem of the area. Use the pit toilets where you can, and if that’s not possible,, bury your poo at least 6 inches deep well away from the boulders.
Don’t be afraid to make friends! Be brave. Approach people. Say hi. Cheer on complete strangers as they try for the send. The beauty of the climbing community is how incredibly open it is. Remember, climbing itself is a universal language!
Always maintain your stoke: Even when you’re suffering with numbed out hands and thin skins as the wind rips across the desert and burns your skin. It can seem miserable at time, but never forget why you’re there. Climbers are climbers, in suffering and in stoke.