The Beginners Guide On How To Get Started Raising Quail
Tired of the same old clucking routine? Have microfarming or backyard homestead dreams but don’t know where to start?
Then it's time to consider raising quail—for profit, meat, eggs, companionship, the choice is yours!
These small but mighty birds are the feathered friends you never knew you needed. With their adorable round bodies and perky topknots, quail are sure to quail-ify as your new favorite backyard companions.
But be warned: once you start raising quail, you'll be hooked—it's a quail-ity addiction!"
For a little background, we are raising Coturnix quail for eggs and meat
This article will provide an introductory, but comprehensive look at everything involved in raising quail, including why people should consider quail farming, incubating and hatching eggs, how to raise chicks week by week, things needed for raising quail, what a backyard quail coop needs, and potential problems with quail and how to solve them.
Think of it as raising quail for dummies.
*This post contains affiliate links.
Why Consider Raising Quail At Home?
There are several reasons why people should consider quail farming, especially if you live in a small space (like an RV or tiny house) with limited outdoor space.
Here are some of the biggest benefits of raising quail vs chickens and other larger poultry.
Space: Quail require less space than other poultry such as chickens,which makes them an ideal choice for small backyard farms. Whereas chickens need about 8 sq. ft. per bird, quail require only one (though giving them more is recommended as quail are very playful birds and do enjoy having the space to do so). Raising quail indoors is also possible for small flocks and the right setup.
Cost: Being smaller means they’re less expensive to feed than chickens so the cost of raising quail is lower. However, game bird feed tends to be more expensive due to a more specific nutritional profile required by quail (higher protein than chickens).
Maturation: Quail mature quickly, so they can start laying eggs at just six to eight weeks old. Chickens take upwards of 6 months (!) to start laying eggs.
Eggs: Quail eggs are considered a delicacy and are in high demand among health-conscious consumers. If selling your quail eggs, they fetch a decent price. If keeping them to eat, they’re more nutrient-rich than chicken eggs (specifically in Vitamin B).
Quiet: Quail are relatively low-maintenance and quiet, making them an ideal choice for raising quail in the city or suburban areas. While male quail will still make noises (especially during mating) that might bother neighbors in close quarters, a quail’s warble is nothing compared to a rooster’s crow.
Sexing: This is a term for determining the gender of your quail. The main dominant coloration patterns of Cotornix quail are feather sexable as young as a month old, whereas some breeds of chickens take months before it's possible to determine if it’s a “hen or roo”. That said, some colorations of quail are not feather sexable, period, and even feather sexable varieties can be difficult to differentiate. The best rule of thumb I’ve found for feather sexing both Italian and Pharaoh colorations (yellow and brown patterened birds, respective) is the amount of red tint to their feather. When comparing males and females of both feather types, you’ll notice the males are significantly more reddish, especially around the breast and throat area.
Ease of processing: Quail are super easy to process (i.e. cull if you’re raising for meat). All it takes is a sharp pair of poultry sheers (these are what we use) to behead, remove the limbs, and remove the spine (AKA “spatchcocking”). I recommend skinning and spatchcocking for quail, as opposed to scalding/plucking and cavity method of removing the entrails as it’s much easier for their size. Once you get the feel for it, you can process an entire bird start to finish in about 5 minutes.
Hardiness: Quail are very hardy little birds. They tolerate both heat asnd cold well. I live in Wyoming where summers get 90F+ and winters often get -30F, and as long as the little birds are given a dry, draft-free space, they handle these subzero temps wonderfully. Without combs, frostbite is less of an issue, too.
However, there are also some cons to consider when raising quail:
Size: A con as much as it is a pro, quail are smaller than chickens, which means that they produce less meat and smaller eggs, so you need to raise way more to get an equivalent amount of food.
Intelligence: Quail are not smart and many quail farmers refer to them as “little kamikaze birds” because of the frequency with which they will try to off themselves, especially when young. Chicks will fall asleep and drown themselves in their waterer if it’s too deep, adults may get riled up to fly in their coop so vigorously they hit their heads and break their necks, etc. We’ve had birds CRAWL THROUGH their feeder port and get stuck in the food bucket (fortunately we found them before they died). In other words, it’s important to idiot proof your quail coop.
Fragility: Quail are relatively delicate birds and can be easily injured or killed if handled roughly or housed in inappropriate conditions. They require careful handling and management to ensure their health and wellbeing. They are also especially susceptible to illness and disease when they’re chicks. Coccidiosis, for example, is one of the most common poultry diseases, and it is EVERYWHERE (soil, birds themselves, etc). With chickens and larger birds, the fatality rate is about 30% or less. With quail, however, untreated coccidiosis is almost always 100% fatal.
Short lifespan: Quail have a relatively short lifespan compared to other poultry, with an average lifespan of 2-3 years. This means that you may need to replace your flock relatively frequently to maintain egg production. On the other hand, this is actually a benefit for those raising quail for meat as it makes culling a little easier.
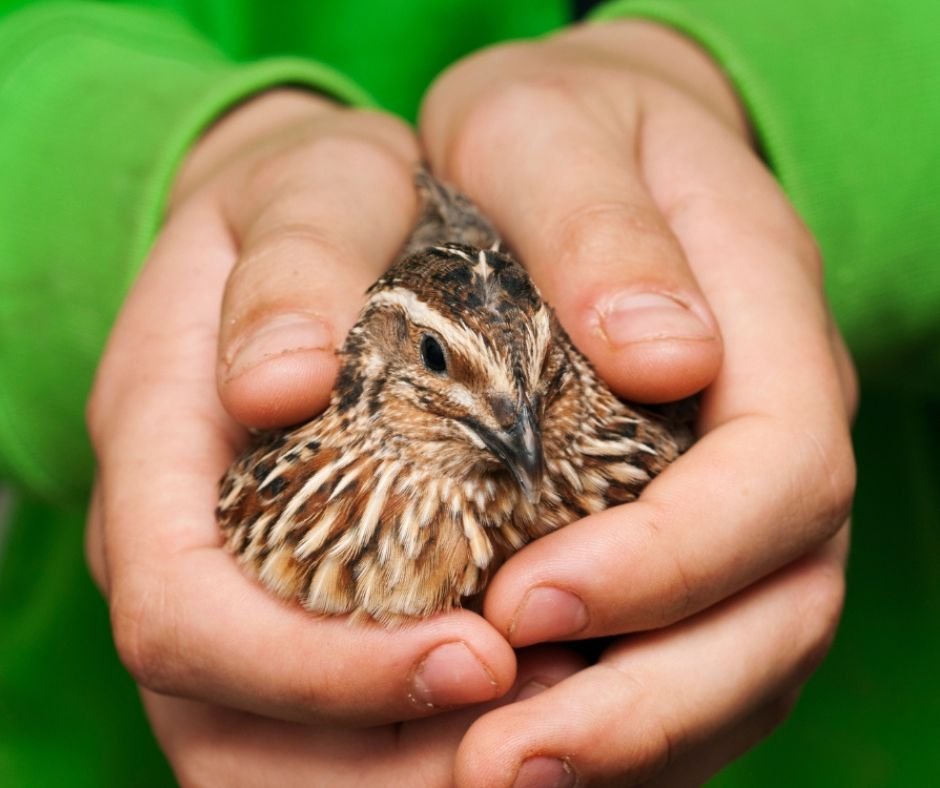
Temperment: Quail are flighty and don’t particularly like to be held and unlike chickens that can form close bonds with their owners and enjoy cuddling, quail never really do, even if regularly exposed to touch and handling as chicks. If you’re raising quail as pets primarily, this is something to consider.
Hatching: Quail require more attention during the incubation and hatching process, as they are more sensitive to temperature and humidity changes.
Raising Quail Eggs: Incubating & Hatching

Before you can raise quail, you obviously need to obtain quail, either in the form of already hatched birds or hatching eggs.
If you can’t procure quail locally, ordering hatching eggs online is the much safer bet than ordering live quail chicks. So much can go wrong with mail order chicks and because quail are so small and fragile (and are very sensitive to temperature changes, of which they’ll experience a lot in the mail), survival rates are low.
Ordering hatching eggs, however, is safer and less cruel to live animals. In our experience ordering hatching eggs to start our flock, we got a 50% hatch rate, though others report a 70% hatch rate from our seller, so we may have simply made mistakes in incubation that first time.
We opted to buy hatching quail eggs from eBay so that we could select a seller closer to us to minimize shipping time and distance. Our hatch rates for eggs from our own flock tend to be much higher.
You’ll also obviously use an incubator. We use the Kebonix 12-egg incubator, though you can fit double that amount of quail eggs in. It’s a great mid-range model that has all the bells-and-whistles you’ll want (automatic turner, built-in humidor, etc) but it much higher quality than cheaper models.
If raising quail from eggs, here are the steps you’ll want to follow, from the beginning of incubation through hatch:
1) Prepping: if ordering eggs by mail, you’ll need to let your eggs rest for 24 hours skinny point down (super important!) to help reattach any air sacks that separated from the shell from being jostled around in shipment. This also gives you the perfect time to get your incubator up to the proper temperature and humidity (95F°-105°F and 45–55% for quail, which are both slightly higher than chickens).
Tip: If you have an incubator with a hatch countdown, remember to set it one day higher (to 19) to account for that extra day.
2) Lay sticky cabinet liner inside: This is helpful for newly hatched chicks struggling to get traction and can prevent spraddle leg.
3) Candle eggs: Before putting your eggs in the incubator, candle them (shine a bright light at the bottom of the egg) to ensure there are no cracks in the shell. You won’t be able to tell which eggs are viable and not at this stage, but it’s important to remove any with even hairline cracks, as they could explode or allow bacteria to leach out from dead embryos and contaminate the other chicks.
4) Start incubating and wait: The incubator should ideally be in a warm room and up on something (not only the floor, where CO2 levels are more concentrated) and you’ll want to keep monitoring your temperature and humidity. The vent should be partially open and you’ll need to add more water from time to time to keep humidity in the proper range (which is why we highly recommend an incubator with an external water port). Be patient and do NOT open the incubator unless necessary. The rapid shift in temperature and humidity can hinder egg development.
Tip: Place a backup thermometer in the incubator as a failsafe against machine error. Our incubator often reads higher than the real temperature is in there, because the built-in thermostat is near the heat device.
5) Turning eggs: Most incubators have automatic egg turners that turn eggs every hour. However, if yours does not, the eggs need to be turned at least three times a day. Even then, hatch rates with manually turned eggs tent to be lower, both because of less frequent turning and temperature disruption each time you do so. An automatic turner is highly recommended.
6) Candle eggs again on day 7: At this point, you’ll be able to see which ones have growing embryos (they’ll look darker and full) and which ones are not fertile (they’ll look empty and the light will shine through). At this point, it’s important to remove non-fertile eggs to prevent them from exploding later on in the incubation process. Just be quick about pulling each one out and putting it back, restoring the lid each time to reduce disturbing the inner conditions too much.
7) Prepare for lockdown on day 14: The period of 3 days leading up to hatch is referred to as “lockdown” during which the incubator is NOT to be opened, period. The humidity should also be increased at this point to 55–75%. However, before this happens, you’ll want to open your incubator and remove the turning separators, even if your incubator has an automatic turning shut-off on day 15 as ours does. You can also candle your eggs again at this point to see if there are any “quitter” (embryos that started to develop but stopped). However, we don’t do this because with quail eggs being as small as they are, it’s remarkably hard to tell which are which at this stage unless you are a certified or expert candler. It’s optional and many quail farmers agree they don’t candle at day 14.
8) Wait (im)patiently for pips: Quail typically hatch in about 18 days, but bear in mind some may take a little longer. We like to leave any late hatchers in there for a few more days before officially proclaiming them duds. A quail begins hatching with a “pip” (when they peck the first hole in their shell). It’s common for quail to pip, then rest for a while, so don’t panic if you see pips but no more action. In our experience, quail take about 24 hours from first pip to “zip” (named because once the chick starts its final hatching push, it pecks a zippered line around its shell to break out), though some may take less or more time.
9) Do not help chicks hatch: It can be really hard watching a chick struggle to hatch, but the process is necessary for their development. There should be no human intervention unless absolutely necessary (i.e. it’s been days since the first pip and the egg is moving, but the chick clearly can’t make more progress). This happened to us once in our first hatch, and we had to aid as little as possible, but the chick still came out with an uncorrectable spraddle leg and was deformed for the rest of its life. In that case, we’re confident it wouldn’t have survived without assistance, but that life-saving effort still had consequences. Patience and trust in nature is key.
10) Let chicks dry and fluff before removing: Your chicks won’t all hatch at the same time—ours usually hatch over a period of 24–36 hours—but it’s important not get impatient and remove chicks right after hatching. They need to be fully dried and fluffed up before coming out of the incubator. Ideally, all your chicks will hatch before having to remove any, but quail, small as they are, should only be left in the incubator for up to 24 hours after hatching without food and water. So if you still have stragglers at that point, you can quickly remove your fluffed up chicks. Just try not to do so if you have an egg currently in the zipping process.
11) Move chicks to a brooder box: Once hatched, the chicks should be moved to a brooder box, which can be anything from a metal farm trough to a cardboard box. We just use a heavy duty cardboard box. It should kept at a constant temperature of around 95°F for the first week and can be decreased by 5° each subsequent week for the first month, after which their adult feathers will be growing in and they can withstand ambient temperature.
Tip: Chicken owners tend to squawk about people using “unsafe” heat lamps (no offense intended), but the reality is, quail are much smaller than chickens and need that extra heat unless it’s the middle of summer. A brooder plate alone won’t cut it. We use three heat sources: a brooder plate, a heated blanket underneath the brooder, and an infrared reptile heat lamp. It’s worth noting we work from home and are basically never away from the chicks for more than a couple of hours at a time, so we can always monitor if things go wrong, but we’ve never had any accidents with the heat lamp.
Raising Quail Chicks Week by Week

Week 1:
After hatching, quail chicks should be fed a high-protein diet of around 28% to ensure healthy growth.
We like Homestead Harvest Game Bird Starter. Being non-GMO and natural, it’s the closest thing to organic quail feed we’ve found, without making it ourselves. It has also higher protein content than other game bird starter mixes, and contains other beneficial ingredients that others do not (such as diatomaceous earth, which is a natural, non-chemical de-wormer).
The chicks should be given access to fresh water and food at all times. You may need to dip their beaks in the water to help them learn where it is, but be careful they don’t get wet. Quail chicks are so small, wet feathers is often akin to death.
You also shouldn’t use a standard chicken waterer. Chicks are so clumsy and will literally fall asleep drinking and drown. We’ve never had a chick drown, but we’ve definitely witnessed their sudden narcolepsy!
That’s why a smaller quail waterer base is needed or else you can place aquarium stones in the bottom of a chick waterer to ensure the water depth is minimal.
You’ll also want to keep your chicks from pooping in the water as much as you can (it’s a never-ending battle, especially as they grow!) and if they do, change it ASAP. This is how diseases like Coccidiosis and ulcerative enteritis (AKA Quail Disease) spread, both of which are devastating to tiny quail chicks. You can also add preventative substances into the water for both (such as Corid for Coccidiosis and BMD Soluble for ulcerative enteritis).
Medicated chick feed does the same as Corid, but many believe (as we’re in agreement) the best route is to start without any medications and just be aware of symptoms so you can start prompt treatment if you notice them. For that reason, common medications should be on hand and part of your essential quail raising supplies because quail chicks will typically die before any mail-order treatments can arrive.
Week 2:
During the second week, the temperature can be lowered to around 90°F, and the chicks should be introduced to a larger brooder area, and you can start raising the height of the brooder plate.
Be mindful that depending on where you live, you may need more or less heat to keep them at the right temperature. Raising quail in Texas in the summer, for instance, is going to look a bit different than raising quail in Colorado in the winter. Be sure to keep a thermometer in the brooder so you know if things are too cold or too hot (which can be just as dangerous).
As they grow, you’ll notice poop start accumulating much faster. Clean conditions are crucial in preventing some of those nasty quail diseases, so have a designated spoon and Tupperware container that we use to spot clean multiple times a day.
If you’re good about spot cleaning, you’ll only need to fully change the bedding about once a week (give or take, depending on how many chicks). Ten is our baseline.
Week 3:
During the third week, the temperature can be lowered to around 85°F.
At this point, they’ll start to learn how to use their wings, and while quail aren’t particularly great flyers, they can certainly get enough air to fly right over the walls of even tall brooders. At this stage, we place an old window screen (so that they’re still getting plenty of light) over the brooder at night and when we’re not home.
We learned this lesson the first time when we had a chick fly out in the middle of the night and came down to find it in the living room!
Week 4:
Your chicks will begin molting as they shed baby feathers and begin to grow adult ones. At this point, those raising Japanese quail may begin to feather sex some of them (though note that some genetic color variants of Coturnix quail, such as Tuxedo and Tibetan, are not feather sexable at all).
For those that are (like Pharaoh and Italian), it’s still not always easy to tell, but females typically have speckles chests while males have more pronounce cheek patterns and flat-colored chest feathers.
Week 5:
Their adult feathers will mostly be in, meaning you can typically move them outside into your quail coop (unless it’s really cold, in which case we would wait a bit longer).
The next stage in your raising quail chicks journey is adding calcium to their diet to prepare for their upcoming egg laying. Unlike chickens, quail don’t really need a specific “layer” feed. As long as they’re getting some additional calcium with their game bird feed.
You can add this either in the form of dried, crushed up eggshells or oyster shells. We do a combination of both, using oyster shells when we feel we don’t have enough eggshells to adequately supplement alone.
The downside to oyster shells is that they come in somewhat large chunks that are fine for chickens but too large for quail. They’ll need to be ground up smaller, either in a food processor or with a mortar and pestle. We do the latter because we prefer keeping things manual as much as possible, but be warned: it’s an arm workout!
Week 6:
At this point, your quail will be mostly mature and should start laying eggs within the next couple of weeks.
Be mindful that, unlike chickens, quail aren’t great about going to the coop’s brooder boxes to lay. They pop out eggs anywhere and everywhere, so watch your step!
Raising Quail In A Backyard Quail Coop
A backyard quail coop should be designed with the needs of the birds in mind.
Firstly, it should be secure to prevent predators from getting in. Be mindful of what those are in your area because some are craftier than others. For example, we have lots of cats and dogs wandering our neighborhood, but no owls or raccoons, so we focus on reinforcing the bottom primarily.
Secondly, it should be well-ventilated to provide good air circulation, especially during the hot summer months. However, it also needs to be draft-free and dry for raising quail in the winter so consider how to balance those needs. We add insulation coverings to the chicken wire holes in the winter to keep the inner brooder part extra dry and warm.
Thirdly, it should have a protected area where quail can cuddle and lay eggs (if desired). This area should be filled with clean, dry bedding material such as straw or wood shavings.
Unlike chickens, quail don’t need a lot of space, which means you have more flexibility in your design.
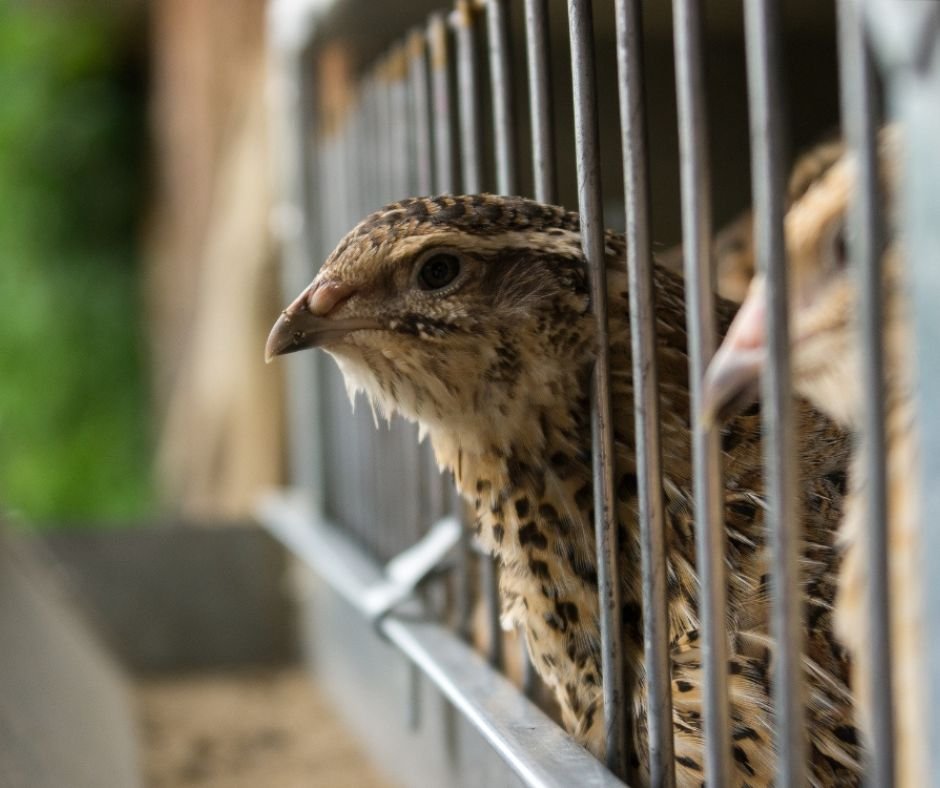
Some people keep quail individually in stacked cages while others treat them like chickens in terms of housing. We fall into the latter camp and prefer a more free-range quail raising style.
Our coop consists of a small prefabbed “chicken” pen (though I would never put more than one actual chicken in it) or rabbit hutch surrounded by an exterior run with a roof to keep water out. Then we just coral the birds from the run back into the smaller coop at night for extra safety.
Other quail raising equipment you’ll need to have in your coop include:
Feeder and waterer: We have two systems. Small ones that attach to the chicken wire inside the inner coop for nighttime use and two large five gallon buckets with food and water taps drilled into the sides of the run portion. These make it so they can’t stir up debris or poop in their food and water.
Bedding: Like pine or hemp bedding. We’ve experimented with both and prefer the latter outdoors and the former for their indoor brooder.
Toys: Quail are quite playful and love having tall grasses and bushy plants to peck at and hide in. You can also make hunt and peck toys, such as drilling holes out of a piece of wood and stuffing meal worms inside.
Sand bath: As you’ll notice in the brooder when they’re young, quail love stirring up the ground, ruffling their feathers and making a whole mess of their bedding. That’s because they naturally “bathe” in sand to keep mites and other insects away. If the ground isn’t naturally sandy, give them a little tray (something like a cake pan, but no Teflon coatings—these are toxic to birds) with some sand in it.
Another quail vs chicken raising different is that quail don’t roost, so there’s no real need for a roosting bar. They also lay eggs andywhere and everywhere, so there’s no need to provide nesting boxes. In all the years I’ve raised quail, I can probably count the number of eggs they’ve actually laid in one on two hands.
Potential Problems In Quail Raising

Like any livestock, quail can experience various health problems, each solved through different means.
Coccidiosis
One of the most common issues in poultry of all kind is coccidiosis, which is caused by a protozoan parasite. This disease can cause diarrhea, dehydration, and weight loss, and can be fatal if left untreated. To prevent coccidiosis, it's important to keep the quail coop clean and dry, and to provide fresh water and clean bedding.
Adding a coccidiostat or an anticoccidial like Amprolium (the active ingredient in Corid) to the quail feed or water can help prevent this disease. We never alter the feed, but will run occasional preventative Corid regiments through their water.
Ulcerative Enteritis (AKA Quail Disease)
Perhaps the most series and common disease to be wary of is ulcerative enteritis. It’s said be a problem for those raising Bobwhite quail primarily, but cases do happen in Coturnix quail, too. It’s an aggressive gut bacteria that, if untreated, can kill in a matter of days. It is caused by the bacterium Clostridium colinum and is often spread through contaminated feed or water.
It can be difficult to diagnose due to its nonspecific symptoms but white, watery poop is the most common. Most quail poop will have some white in it, however, so make sure it satisfies both conditions.
Treatment typically involves the use of antibiotics—Duramycin-10, ideally, but this is becoming hard to come by after the recent FDA ruling that all animal antibiotics will require a vet prescription after June 2023. Other options are Amoxicillin and Doxy-Tyl, though we haven’t used these yet.
However, antibiotics should always be a last treatment resort, and you don’t want to rely on them (especially given they’ll now be expensive to procure!). Best to exercise prevention strategies, including maintaining clean and dry housing, providing clean water and feed, and avoiding overcrowding.
It’s also important to bear in mind that most medications have what’s called an “egg withdrawal” period, or a set timeframe after taking that their meat and eggs should not be consumed. This is important to know if raising meat quail or eating their eggs.
Worms
Worm infestations are a common problem in quail and can be caused by a variety of parasitic worms, including roundworms, tapeworms, and cecal worms. These worms can cause a range of symptoms in quail, including weight loss, decreased egg production, diarrhea, and even death in severe cases. Worm infestations are typically spread through contaminated feed or water, and can be difficult to diagnose without a fecal exam.
Treatment for worm infestations in quail typically involves the use of anthelmintic medications, along with good management practices such as maintaining clean housing, providing fresh water and feed, and avoiding overcrowding.
Prevention strategies include regular fecal exams and deworming as needed, as well as good biosecurity measures to prevent the introduction of new worms to the flock.
As mentioned before, we give feed with diatomaceous earth in it and have never had worm problems as a result. It’s 100% safe and natural (we even take it ourselves to reduce our own parasitic load—because if you didn’t know, you probably have parasites!).
Feather Pecking
Another common issue is feather pecking, which is when quail peck at each other's feathers, leading to injury or even death. This behavior can be caused by various factors such as overcrowding, boredom, or nutritional deficiencies.
There may not be any reaosn at all. Sometimes, the little birds just wake up and choose violence.
To prevent feather pecking, it's important to provide enough space for the quail to move around, as well as plenty of enrichment such as toys.
Additionally, ensuring that the quail are fed a high-quality diet that meets their nutritional needs can also help prevent this behavior.
There are skin treatments you can apply to discourage picking, but they’re sometimes more or less successful. I keep Rooster Booster Pick-No-More on hand for severe cases, and while it does help some, I wouldn’t say it’s even close to 100% effective.
Whatever you do, DO NOT use Blu Kote. it is incredibly toxic and was recently banned in Canada for this reason.
Egg Problems
Another problem that can occur when raising quail is egg production problems. Quail can experience issues such as low egg production, thin-shelled eggs, or eggs with abnormal shapes. These problems can be caused by various factors such as stress, disease, or nutritional imbalances.
To prevent egg production problems, it's important to provide a clean and comfortable nesting area, as well as a high-quality diet that meets the quail's nutritional needs. Additionally, ensuring that the quail are kept in a stress-free environment can also help promote healthy egg production.
Fortunately, they’re less likely to get egg-bound (and related vent prolapse issues) than chickens, though it does happen on rare occasions. Egg binding can usually be solved with a warm epsom salt bath and some gentle massaging.
Fly Strike
This happens when flies lay eggs on your birds and they hatch. The larvae then essential devour their flesh. It’s a nasty disease and one I’ve fortunately never had to personally contend with.
This is why it’s very important to keep your coop clean. Feces will attract flies and the more flies there are, the greater the chance of fly strike.
Obviously, you can’t prevent all flies in your coop, but you can take preventative measures to keep them down, such as:
Ensuring your quail have dust to bathe in. Poultry of all kinds dust bathe to keep themselves cool, clean, and insect-free, so it’s important to give your birds this option. We raise quail on the ground using consruction sand as the bedding, which easily allows thme to dust bathe. If raising quail in cages on wire, be sure to provide a separate dust bath for them. I add Preen Queen Dust Bath Additive to the ground in the summer. It’s filled with natural herb extracts and essential oils like oregano and peppermint, which discourage flies (but again, don’t prevent them completely).
As noted, keep your coop clean.
If you notice flies are getting heavy, hang some fly paper, but be wary that your birds may easily knock it down if they fly into it.
As a last resort, you can treat the coop and your birds with an insect repellant, but make sure it is natural and non-toxic, like PREMO Poultry Spray.
Others
There are of course countless other problems that can arise. When they do, Backyard Chickens is a wonderful online forum filled with countless poultry experts waiting to chime in with suggestions and solutions. Remember, we were all beginners at one point, and we all need to learn, so don’t be afraid to ask. We’re still learning and asking all the time.
Just be mindful of common symptoms of disease, so you don’t suddenly come out and find a dead quail. Sudden death is rare; they will almost always show symptoms if you know what to look for.
Common signs something is wrong include: not eating and/or drinking, sleeping a lot in the corner with feathers fluffed, droopy eyes and head, and diarrhea. Please note that all quail (like humans) will have runny poop from time to time. If it’s regular, though, it’s a problem. Adult, sexually active males will also have foamy more liquid poops. This is normal and no cause for alarm.
Tip: Don’t be a hypochondriac, either. It’s really easy to obsess over something that seems like a symptom, when it might not be, especially when they’re young, and you’re new to quail parenting. For example, I was convinced my first flock has quail disease because one of my quail was super sleepy, didn’t like to stand, I saw runny poop, etc. Feces is especially unreliable for diagnosing when they’re young because temperature alone will change it. If the brooder is too hot, for instance, they poop will be more runny. A little white is also 100% normal in quail poop, so as a new bird parent, it can be difficult to tell whether the amount of white is normal or abnormal. These are things you’ll get more comfortable with assessing naturally over time.
Turns out, he’s just a plain lazy bird. He’s perfectly healthy and still today doesn’t like to stand up more than he has to. Like people, quail are unique and have their own personalities!
Raising Coturnix Quail FAQ

1. Is raising quail profitable and how much money can you make raising quail?
Yes, with a large enough flock, you can make money raising quail. The most common avenue of income is raising quail for eggs (whether to eat or hatching eggs to others who want to start raising quail in backyards of their own).
It’s understandable, considering it’s an excellent source of side income to support your backyard homestead dreams.
Despite their small size, quail eggs are considered a delicacy and thus a dozen can fetch a decent price—as little a $5 a dozen to $1 per egg in specialty markets.
So say you only have five hens laying about once a day, that’s 150 eggs or a little over 12 dozen. Depending on how much you think you can sell quail eggs for near you, you can calculate potential profit from there.
If raising quail eggs for profit, just keep in mind that you might not make money right away. You’ll need to balance out your startup costs first before you can turn a profit.
2. What is the cost of raising quail for meat?
The cost of raising quail for meat can vary depending on a number of factors, including the cost of feed, housing, and other supplies.
We tracked all of our quail raising supply expenses starting out and they came to about $1000. Granted, we didn’t go cheap on things like the incubator. However, the majority of that were one-time startup costs for things that will last as long as we keep raising quail.
As far as repetitive costs, here’s a breakdown of what we pay for a flock of 10:
Feed: $60/month (probably a little less, as a bag lasts a bit longer than that) for Homestead Harvest 40 lb game bird feed. Note, there are much cheaper feeds available if you’d prefer, but feed is something we absolutely will not compromise on quality, so we’re happy to pay for a more expensive and nutritionally complete brand.
Bedding: $10 a month. We buy massive Hemptana hemp bags that only cost $20 and last us a couple of months.
Medicine / diet supplements: Most of our medicine was bulked into startup costs (it lasts forever!) but for things we do replace more regularly like chick electrolytes and probiotic feed additives, we pay an average of $10 a month.
All that totals up to about $80 a month. It’s not that bad and with a larger flock, you could certainly sell enough eggs to at least match that.
3. How many quail should I start with?
Whatever you feel comfortable with and have space for. Again, quail need about one square foot per bird, but more is better.
Don’t get yourself in over your head as you’re just beginning. We started with 10 quail chicks, and that felt reasonable. I probably wouldn’t have wanted more when getting my feet wet. And currently, given my 24 square foot coop and run combo, I typically keep my flock around 20-25 birds, and less in the winter when they’re not laying consistently.
4. Are quail better to raise than chickens?
Whether quail are better to raise than chickens depends on your personal preferences and goals as a farmer.
Factors like size, noise level, and maturity rate are reasons why many prefer quail.
However, chickens are less fragile, live longer, and produce larger, more substantial eggs.
5. How much land do you need to raise quail?
There is no set amount of land needed for quail raising. They don’t require much space, so as long as you balance the size of your flock with the size available, things will be fine.
For instance, raising quail in cages indoors is possible, or you can go the traditional outdoor route. We only have a small yard and their coop and run combined measure 4’ x 6’.
6. How many breeds of quail are there, and which are best if raising quail for eggs and meat?
There are many different breeds of quail, but the most common for those raising backyard quail are Coturnix quail (also known as Japanese quail) and Bobwhite quail. Within those, there are many genetic color variations. While there is no one best breed, some do have certain advantages.
Raising jumbo Coturnix quail, for instance, is preferential for those raising quail for meat because they can weight up to 16 oz.
Meanwhile, those raising quail for eggs might avoid Tibetan and Tuxedo quail (which are genetic color variations of Coturnix quail) because they can’t be feather sexed.
The Road Ahead With Quail Raising
So, is raising quail worth it?
Quail, yeah, it is!
Raising quail for meat and eggs is an egg-citing and feather-raising adventure that's well worth the effort. With their small size, easy upkeep, and charming personalities, quail make the perfect addition to any backyard flock.
So don't be afraid to take the plunge—we promise it'll be a quail of a time!
**This post contains affiliate links to support the continued creation of these van life guides. This just means that if you purchase something from one of the links above, I get a small commission from the sale at no cost to you. Read more here or reach out with more questions.